Master handmade jewelry with these 7 essential knots! From the Overhand to the Surgeon’s knot, we break down the techniques every beginner crafter needs to create stunning pieces.
Have you ever gone to a craft store, bought a beautiful spool of waxed cord and a handful of stunning gemstone beads, only to get home and realize you have absolutely no idea how to tie them together? You try to form a loop, the cord slips, you yank too hard, and suddenly you’ve created a tight, ugly clump of string. It’s frustrating. It’s demoralizing. And frankly, it stops a lot of people from ever starting their jewelry-making journey.
But here is the truth: jewelry making is not about magic. It is about mechanical repetition. Once your fingers learn the “grammar” of knotting, the possibilities are endless. I have identified 7 essential knots that act as the foundation for almost every handmade bracelet, necklace, and earring in existence.
You don’t need a YouTube tutorial for every single project. You just need to memorize these seven. Let’s turn that tangled frustration into beautiful, professional-grade jewelry.
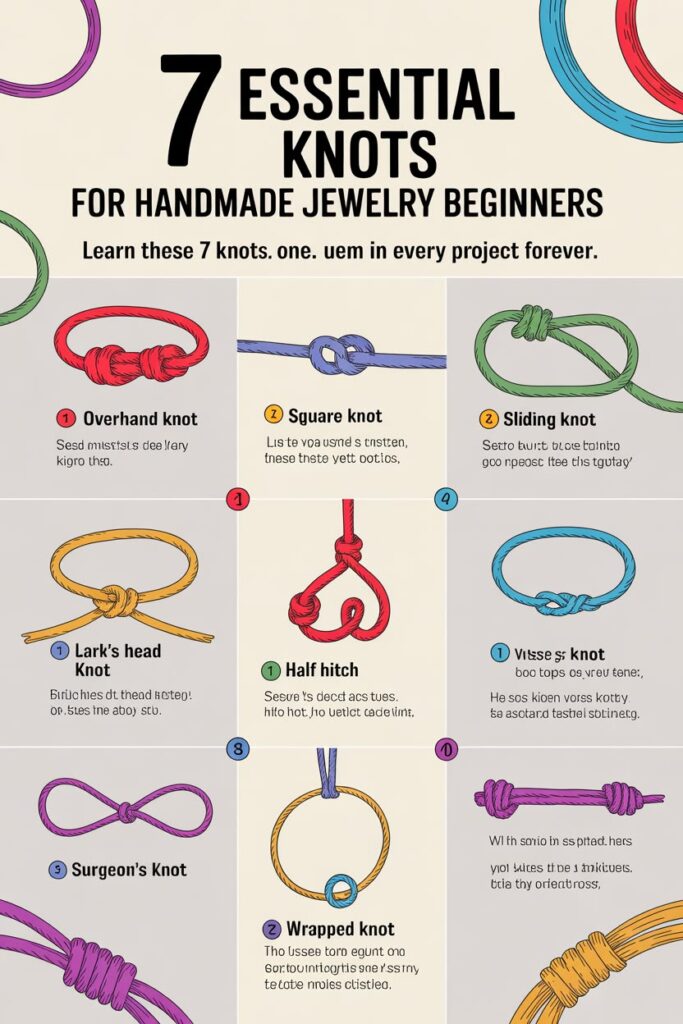
Why Mastering Knots is the Secret to Professional-Looking Jewelry
Before we get our hands dirty, let’s talk about why knots matter so much. A piece of jewelry is only as good as its weakest link. If you rely on cheap glue or a poorly tied tassel, you are risking a catastrophe.
The Difference Between a “Slip” and a “Secure”
The single biggest indicator of a homemade piece versus a professionally made piece is the tension of the knot. A professional pulls the cord with a steady, even force, seating the knot firmly without warping the cord. A beginner often pulls too hard, warping the design, or too softly, leaving a “wobbly” knot that will unravel after a few wears.
The beauty of these seven knots is that they are designed to lock into place. When tied correctly, they refuse to move. You can wear your bracelet in the shower, while sleeping, or during a sweaty summer hike, and they will hold firm.
The Right Cord Makes the Right Knot
I want to offer a piece of “Experience” advice right off the bat: Do not use a leather cord technique on a silk cord. It will fail.
- Waxed Cotton/Nylon: Excellent for the “Square Knot” and “Surgeon’s Knot” because the waxy texture provides grip.
- Silk and Rattail: Extremely slippery. You must use the Surgeon’s Knot for these.
- Leather: Stiff and difficult to tie complex knots with, but it takes well to the “Wrapped Knot” for a rustic look.
Pick your cord first; let that choose the knot you use.
Knot #1: The Overhand Knot (The Foundation of Everything)
Let’s start with the absolute simplest knot in existence. If you have tied your shoelaces, you already know how to do this.
How to Tie It
Take your cord, create a simple loop by crossing the tail over the standing part, and pass the tail through the hole. Pull it tight. That is it.
The Beginner’s Trap
Here is the catch that most people don’t know: If you are using nylon cord, pulling an Overhand knot brutally tight can actually heat-fuse the nylon together, causing it to melt and weaken. Instead of yanking it until your fingers turn white, pull it firmly, then cinch it down gently with your fingernails. This creates a dense, hard little bead of cord that acts as a perfect stopper for beads, ensuring they don’t slide off the ends of your work.
Knot #2: The Square Knot (The Connector of Two Cords)
If you have ever seen a macrame plant hanger or a cute friendship bracelet, you have seen the Square Knot. It requires two cords (or two pairs of cords).
The “Right Over, Left Under” Rule
Here is the finger-memory trick: You take the right cord, cross it over the center, and go under the left cord. Then, take the left cord, go over the center, and come up under the right. Pull tight. Repeat this in reverse.
The Visual Appeal
When tied perfectly, the Square Knot creates a beautiful, braided, flat ribbon effect. It is the workhorse of the jewelry world. I use this for almost all of my beaded wrap bracelets. It sits flat against the wrist, ensuring the bracelet is comfortable to wear all day, while providing a massive amount of visual texture.
Knot #3: The Lark’s Head Knot (The Mounting Knot)
Now, how do you attach a cord to a metal ring or a clasp? That is where the Lark’s Head comes in.
How to Connect to a Foundation
Take your cord, fold it exactly in half. Place the loop end under the metal ring. Now, take the two loose ends, pass them over the metal ring, and push them through the loop. Pull the ends downwards until the knot cinches tight against the ring.
This knot is a life-saver. It creates a clean, seamless connection to clasps without needing any messy glue or wire wrapping. Once you learn this, you can attach any cord to any jump ring in under five seconds.
Knot #4: The Half Hitch (The Tightener)
The Half Hitch is a deceptively simple knot that does one thing exceptionally well: it locks a cord against a post or a previous knot.
The “Locking” Mechanism
To tie it, you simply loop your cord around a stable post (or around the vertical center cords of your project) and pass the tail through the loop.
Paired with the Lark’s Head
Here is an expert tip: If you tie a Lark’s Head to a ring, the cord is just “hanging” there. It might slip. But if you tie two Half Hitches directly below that Lark’s Head, the connection becomes absolutely bulletproof. It is the structural equivalent of putting a lock on a door. For anyone who hates pulling out the hot glue gun, the Half Hitch is your best friend.
Knot #5: The Sliding Knot (The Adjustable Bracelet)
This is the absolute gold standard for crafters. If you sell jewelry at a market, this knot is your secret weapon.
The “Gift” Knot
The Sliding Knot allows you to make a bracelet that fits any wrist size. The wearer pulls the cords in opposite directions to tighten the bracelet around their arm, and pulls them apart to loosen it.
How to Tie It
It is essentially a very specific wrapping technique. You take the two ends of your bracelet and point them back towards the center. Take one tail, wrap it around the other two center cords three or four times, and then pass the tail back through the loops you created. You then repeat this process on the other side with the opposite tail. The friction of the wraps creates a channel that allows the cords to slide, but catches when you pull tight.
It is magical. It takes practice to keep the wraps neat, but once you master it, you will never use a metal clasp again.
Knot #6: The Surgeon’s Knot (The Life-Saver for Slippery Cords)
I have saved this one for just before the Wrapped Knot because it is truly a “saving” knot. Have you ever tied a Square Knot, only to have it completely unravel because you were using cheap, slick nylon cord?
Just Like a Square Knot… But Better
The Surgeon’s Knot is a variation of the Square Knot. The difference? When you do your first “Pass” (Right over Left), instead of bringing the cord through once, you wrap it through twice.
That extra loop creates massive friction. It “bites” into the cord. You then finish the knot with the standard second pass. This is the absolute only knot I trust for silk and rattail cords. If you are making a delicate, beaded necklace and you want it to survive the shipping process, use the Surgeon’s Knot.
Knot #7: The Wrapped Knot (The Finishing Touch)
Finally, we come to the Wrapped Knot. This is the knot you use to finish a tassel, a macrame bracelet, or to hide the ugly frayed ends of your cord.
The “No-Glue” Strand
To do this, you take a short (about 4-inch) piece of your cord and lay it along the bundle of cords you want to finish. Then, you take the long end of that wrapping cord and start winding it very tightly around the bundle, moving upwards from the bottom. You wind it until the wrapping covers about half an inch of your cord.
To tie it off, you pass the loose tail through the bottom loop you left at the start, and pull the top end to cinch the loop underneath the wraps.
Pro-Tip: Because this knot relies entirely on tight friction, I always recommend putting a tiny dot of clear nail polish or superglue on the wrapped area. It doesn’t show, it seals the cord fibers, and it ensures your Wrapped Knot will never unravel, even after months of daily wear.
Pro Tips for Knotting like a Master
Before you rush off to grab your cord, let me offer a few final pieces of advice born from my own mistakes.
- Invest in an Awl: An awl is a small, sharp, pointed tool. When you tie a knot too tightly and you need to open it up to adjust a bead, gently insert the awl into the “eye” of the knot. It will lift the loops just enough to let you loosen the cord without damaging it.
- Handle with Clean Hands: The oils from your fingers can degrade waxed cotton and darken light-colored leather over time. A quick wash of your hands before a knotting session will keep your cords looking pristine.
Conclusion: Your Fingers Are the Only Tool You Need
There is a profound, quiet meditation that comes with hand-knotting. You are not just making a product; you are weaving patience, tension, and precision into every twist.
These 7 essential knots are the building blocks of hundreds of different jewelry designs. You don’t need to buy expensive kits or complex jigs. You just need a piece of cord, a quiet afternoon, and the willingness to fail the first time, untie it, and try again.
When you finally complete that bracelet, hold it up to the light. See how the knots sit perfectly? You did that. Nobody else. And tomorrow, you can do it again, even better.
Now, I want to hear from you! Which of these 7 knots has given you the most trouble in the past? Are you struggling with the Sliding Knot, or is the Wrapped Knot your nemesis? Drop your questions in the comments, and let’s help each other master the art of the hand-tied knot!