How to Bead a Daisy Chevron Stitch: Step-by-Step Tutorial
Learn the beautiful Daisy Chevron beading stitch with this easy diagram guide. Perfect for making floral beaded bracelets, necklaces, and straps. Beginner-friendly tutorial!
Introduction: The Perfect Floral Beadwork
If you love the look of intricate, hand-beaded jewelry but feel intimidated by complex weaving techniques, the Daisy Chevron Stitch is the perfect pattern for you.
This beautiful stitch creates a striking, zig-zagging floral ribbon. It uses a clever combination of spacer beads and stacked petal beads to form continuous, interlocking flowers. As you can see from the finished pieces in the image, the result is a textured, 3D band that looks like a blooming garden wrapped around your wrist.
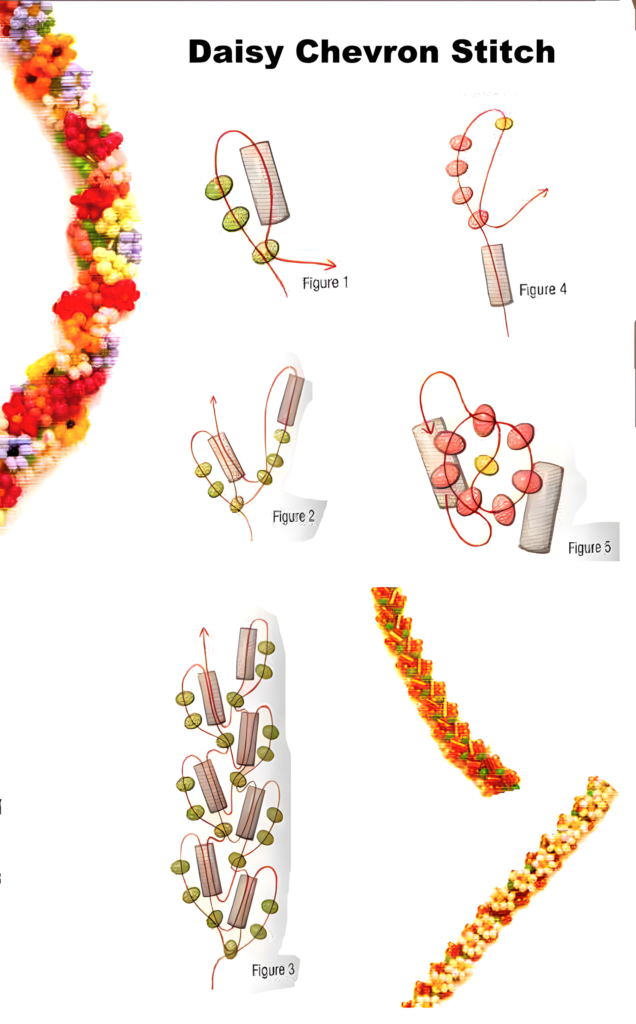
The diagram above breaks this down into 5 simple figures. If you can thread a needle and pull through a seed bead, you can master the Daisy Chevron Stitch! 🪢✨
What You Will Need
To get started with this beadwork project, gather these materials:
- Seed Beads: You will need three distinct colors.
- Spacer Beads (Green in the diagram): Small, round beads used to connect the flowers.
- Petal Beads (Pink/Orange in the diagram): The main color for your flower petals.
- Center Beads (Yellow in the diagram): A contrasting color for the center of each daisy.
- Beading Needle: A very thin, sharp needle (size 10 or 12) to pass through the tiny holes of seed beads.
- Beading Thread or Nylon Wire: A strong, fine thread (like Nymo or Fireline) that won’t fray easily.
- Scissors: Sharp, small scissors for trimming thread.
Step-by-Step Tutorial: The Daisy Chevron Stitch
Follow these steps carefully, referencing the Figures provided in the image. The pattern creates a repeating zig-zag “V” shape.
Figure 1: The Foundation Row (The Spacers)
- Start with a long piece of beading thread.
- Thread your needle and pass it through 2 Green spacer beads.
- Bring your needle back down through the first Green bead and then back up through the second Green bead to lock them in place securely.
- Leave a long tail at the beginning—you will use this to attach a clasp later.
Figure 2: Adding the Second Spacer
- Add 1 more Green spacer bead to your thread.
- Pass the needle down through the bead directly below it (the second Green bead from Step 1).
- Pull the thread tight. You are now creating the “zig” part of the zig-zag chevron pattern.
Figure 3: Building the Chevron “Legs”
- Continue this pattern: Add 1 Green bead, pass down through the bead below.
- Repeat this 2-3 times to create a descending “leg” of green spacer beads.
- Pro-Tip: The length of this green “leg” determines the width of your finished chevron strap.
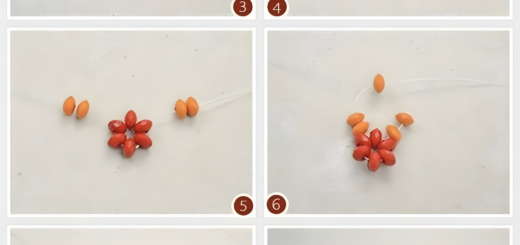
Figure 4: Creating the Daisy Petals
- Once your green foundation leg reaches the desired length, it’s time to start the flower.
- Thread on 5 Pink Petal beads in a row.
- Add 1 Yellow Center bead at the end of the pink beads.
- Now, loop your needle backwards through the first Pink bead you just strung (the one closest to the green spacer).
- Pull the thread gently. The pink beads will form a loop around the yellow bead.
- Continue threading the needle through the remaining 4 Pink beads. Pull taut. You have just created your first daisy!
Figure 5: Connecting to the Next Flower
- Now that your first daisy is completed, you need to start the next one going down the other side of the zig-zag.
- Thread on 1 Green spacer bead.
- Pass your needle down through the bead below it (the top Green bead of the next leg).
- Repeat the daisy process: String 5 Pink, 1 Yellow, loop back through the first Pink, and pull tight.
- The Zig-Zag Rhythm: You are essentially doing a repeating pattern of: Green bead down, Daisy flower on the right, Green bead down, Daisy flower on the left.
Finishing the Pattern:
- Continue adding green spacer beads and daisy flowers, alternating sides, until your chevron strap is as long as you want it.
- The bottom right of the image shows two finished examples. Notice how the alternating flowers create a beautiful, dense, 3D ribbon effect.
- To finish, weave your thread back through the foundation row of green beads, tie a secure knot, and attach a clasp (like a lobster claw) to the ends.
Pro-Tips for Perfect Daisy Chevron Beadwork
- Tension is Critical: The key to a flat, even chevron is consistent tension. If you pull the green spacer beads too tight, the strap will curl. If you pull too loose, it will look floppy. Practice on a short sample to get the feel.
- Choose the Right Beads: Japanese glass seed beads (like Miyuki or Toho) are highly recommended. Their uniform size makes the chevron pattern crisp and professional.
- Use a Bead Mat: Because seed beads are tiny and roll easily, work over a soft beading mat or a low-pile towel so you don’t lose any beads if you drop them.
- Color Planning: Use the bottom-right finished samples as inspiration. You can make a monochrome chevron (like the gold/orange sample) or a vibrant, multi-colored chevron (like the rainbow floral sample) by changing your petal beads every few flowers.
Creative Uses for the Daisy Chevron Stitch
This technique is incredibly versatile. Here is how you can use your finished beaded band:
- Floral Bracelets: As shown in the image, this stitch makes a stunning, chunky flower bracelet that wraps beautifully around the wrist.
- Bag Straps: Use a thicker beading wire and larger seed beads to create a colorful, durable strap for a clutch purse or cross-body bag.
- Decorative Lanyards: Create a custom, stylish lanyard for your ID badge or keys.
- Necklace Band: Use a single color palette and add a large pendant to the center for a stunning, handcrafted necklace.
Conclusion
The Daisy Chevron Stitch is a wonderful way to elevate your beadwork skills. It takes a simple looping technique and turns it into a stunning, structurally sound fabric. With just two steps—creating the green spacer legs and looping the pink petals—you can create a masterpiece of bead art.
Save this guide to your Pinterest board for your next beading project! Let me know in the comments: What color combination are you going to try for your first Daisy Chevron?
Happy Beading!